After my first go at creating rayograms in the dark room, I took the rest of my light-sensitive paper and had another attempt to try out some different objects and techniques.
Coloured lighters.
Here is the test strip I did to see how long I should expose the paper for to get the best results. I exposed it in stages of 5seconds between 5 and 20 seconds.

I found that 10 seconds was the perfect exposure time to create a good image and show that the different colours exposed differently.

I used the trays of developer and fixer to finish this image as apposed to putting the paper into the machine. I used a paintbrush to select certain areas to develop rather than the whole thing.

I used the same technique on this image as I did above, I brushed less developer on to this one to make the image appear more vague.

I experimented with moving the objects every 3 seconds of exposure time - however this test didn't work very well because the paper was still exposed a long time.

This experiment of moving the object worked much better than the last one as overall I didn't over-expose the paper and you can see faint outlines of the lighter.

A five pound note.
This was my test strip for the five pound note. I did steps of 3 second exposure times between 3 and 15 seconds. As you can see none of the results are particularly brilliant.

Here is my final five pound note, which I decided to expose for 20 seconds after looking at my test strip. I like the effect because you can almost see through it.

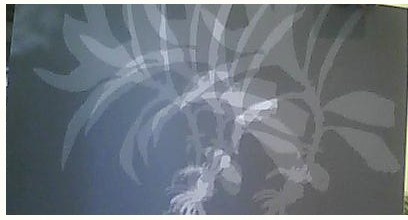
A small branch.
The test strip was exposed to 5, 10, 15 and 20 seconds. The best result for this one I think is the longer exposure time.

This is the full exposure of 20 seconds after I had done the test strip. I like how the white stands out so strong against the black background.

I tried moving the plant similarly to how I moved the lighter earlier. I kept a short exposure time of 2 seconds between movements and I also only moved it a few times.
I used the same technique as the previous rayogram however this time I exposed it more times therefore the image appears darker.

I really like the forest-like look that the small branch gives off when moved. I might be able to incorporate this somehow into my animation ... maybe as a background.
No comments:
Post a Comment